Ever find yourself sipping on a cup of tea and wishing you could get that same flavor-packed punch every time? Trust me, drying your own herbs is the secret sauce to unlocking flavors that’ll leave your taste buds dancing. It’s not just about convenience—though that’s a big part of it—but also about savoring the high-quality herbal goodness you’ve grown yourself or picked up at the market.
Key Takeaways:
– Dried herbs offer incredible health benefits and flavor retention.
– Popular herbs for tea include chamomile, mint, and lemon balm—each has its unique drying method.
– There are three effective drying methods: air drying, oven drying, and using dehydrators.
– Proper storage is crucial to maintaining flavor and freshness, so don’t skip the airtight containers.
– Avoid common pitfalls like over-drying or improper storage to get the best tea infusion.
Introduction to Drying Herbs for Tea
Why bother drying your own herbs for tea when you can snag a box off the shelf, right? Well, for starters, there’s a world of flavor waiting in dried herbs that most commercial teas don’t capture. Those fresh herbs bursting with nutritional value can be transformed into herbal infusions that’ll put your go-to tea bags to shame.
When you dry herbs, you’re preserving their freshness and quality. Plus, you can tailor your mixes to your specific tastes or health goals. Want something to help you relax? Go for chamomile. Need a little energy boost? Mint’s your pal. The bottom line? Dried herbs can enhance your tea game and give you access to a treasure trove of health benefits.
Best Herbs for Tea and Their Drying Characteristics
Popular Herbs for Drying
Let’s kick this off with a shortlist of herbs that pack a punch in your teacup:
- Chamomile: Known for its calming effects, drying chamomile flowers preserves their sweet, apple-like flavor.
- Mint: Whether it’s peppermint or spearmint, these herbs retain their freshness and invigorating aroma when dried properly.
- Lemon Balm: This herb gives you a hint of citrus and a relaxing vibe—perfect when you need to unwind.
- Lavender: This fragrant herb adds floral notes to your tea, uplifting even the heaviest of moods.
- Thyme: Often overlooked in the tea world, thyme provides a savory twist that’s both aromatic and earthy.
Each of these herbs has unique drying characteristics. For instance, chamomile is delicate and requires gentle handling after harvest, while mint can withstand a bit more humidity. Knowing the flavor profiles and required drying conditions can make a world of difference.
Effective Methods for Drying Herbs
Air Drying Techniques
This is the classic method for a reason—it’s simple, effective, and totally free! You just need a good spot in your home that’s dry and well-ventilated. Picture this: hang drying several bunches of herbs, tied together, hanging in your kitchen. You’re letting nature do the work!
Here’s how to get it right:
– Gather your herbs when the sun is shining. Morning is usually best—this way, you’ll have lower moisture levels.
– Ensure they’re clean and free from dirt; a quick rinse and gentle shake should do it.
– Tie the stems together and hang them upside down in a dry environment. Avoid direct sunlight, which can zap away their flavor.
Let them dry for about 1-2 weeks depending on humidity. You’ll know they’re ready when the leaves crumble easily.
Oven Drying Techniques
Got the need for speed? Oven drying’s where it’s at. This technique is more controlled and quicker than air drying, but beware—too high of a temperature can degrade your herbs. You want the low temperature game.
Here’s how to nail it:
1. Preheat your oven to the lowest setting, usually around 180°F.
2. Line baking sheets with parchment paper and spread the herbs out in a single layer.
3. Pop them in for about 2-4 hours, flipping them halfway through to ensure even drying.
Check on them consistently. You want them completely dry but not burnt. The smell of your herbs as they dry? Absolutely heavenly!
Dehydrator Drying Techniques
For the gadget geeks among us, using a dehydrator is like using cheat codes for drying herbs. It offers consistent heat and helps retain the essential oils that give your herbs their character.
Here’s how you can make it work:
– Set your dehydrator to the recommended temperature for herbs, typically around 95°F to 115°F.
– Place your herbs on the drying trays, ensuring consistent heat circulation.
– Drying time may vary, but most herbs will be ready in about 4-12 hours.
Once they’re crunchy, pack them up right away for maximum flavor preservation.
Storing Dried Herbs for Maximum Freshness
Best Storage Methods
So, you’ve dried the herbs—now what? Let’s not ruin all that hard work with poor storage methods. The right preservation techniques can help maintain the flavor longevity of your herbs.
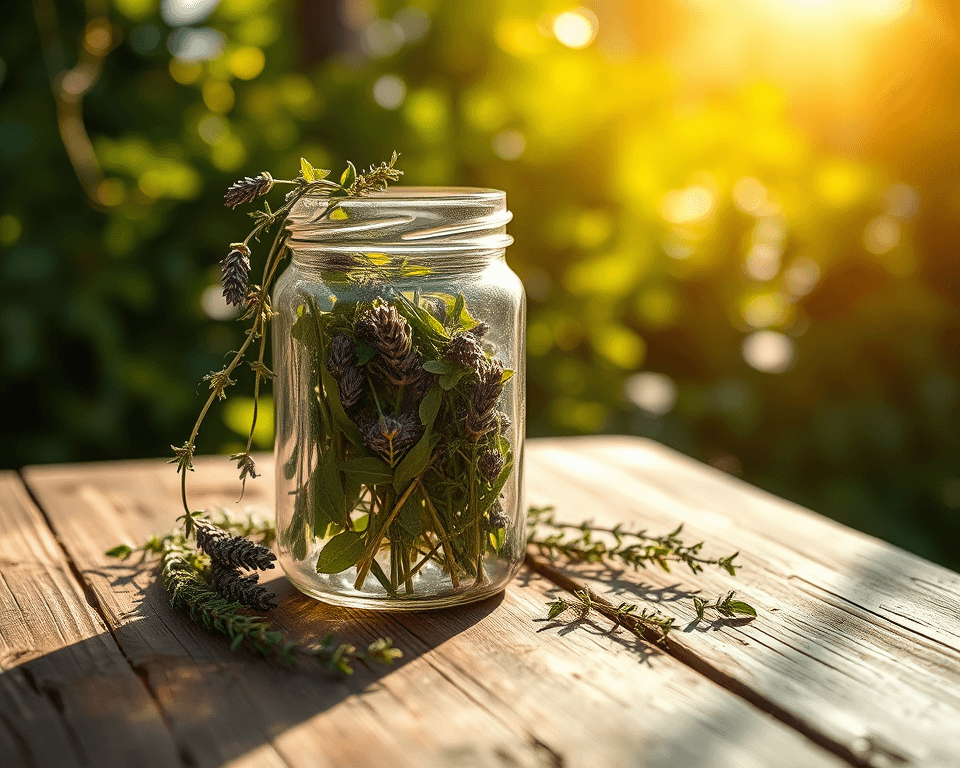
Airtight containers are your besties here. I recommend glass jars with rubber gaskets—they keep light and moisture out. Store them in a cool, dark place like a pantry or cupboard away from heat sources to keep humidity at bay. Avoid clear jars since light can degrade flavor over time.
To maintain freshness, consider a few simple practices:
– Label the containers with the herb name and date dried to keep your inventory organized.
– If you notice any moisture, it’s time to rethink your storage.
Labeling and Organizing Dried Herbs
You want to take pride in that perfect herb collection, right? So, let’s get it looking sharp and efficient. Having a user-friendly organization system can make all the difference.
I suggest allocating shelf space for each herb type, providing easy access. Grab some labels and write down:
– The herb name
– The date it was dried
You can even categorize them by flavor profile or by tea blends. It not only looks great but will make whipping up a cup of tea feel streamlined and effortless.
Common Mistakes to Avoid When Drying Herbs
Top Pitfalls and Their Solutions
Let’s cut to the chase—nobody wants to ruin their herbs after all that effort. Here are common mistakes and how to avoid them, so you can enjoy stellar herbal teas sheet after sheet.
- Over-drying: This one’s a true flavor killer. Keep an eye on your herbs, pull them out when they’re flaky—not bone-dry dust.
- Moisture retention: If your herbs aren’t completely dry before storage, they can mold. Always ensure they snap easily between your fingers.
- Not paying attention to types: Not all herbs dry the same way! Some like basil lose flavor quickly, while others like rosemary can handle a bit more time.
Using the right methods and staying attentive to their specific needs is crucial.
Additional Creative Uses for Dried Herbs
Beyond Tea: Culinary Applications
Don’t stop at just brewing tea—dried herbs are your ultimate culinary secret weapon! They can turn bland meals into taste explosions.
Add dried mint to yogurt or sprinkle lavender on desserts for an elegant twist. Got a spaghetti sauce that’s just okay? Toss in some dried basil or thyme for an instant flavor upgrade. You’d be surprised at how well these little flavor bombs work. Remember, the versatility is endless.
Drying herbs isn’t just about tea; it’s about enhancing your entire culinary experience. Embrace the process, have fun experimenting, and let those dried herbs revolutionize both your tea game and your meals.
Frequently Asked Questions
What is the best time to harvest herbs for drying?
The best time to harvest herbs for drying is during the morning after the dew has evaporated, but before the sun is too high. This ensures lower moisture levels in the leaves and helps preserve the herb’s flavor and aroma.
How can I tell when my herbs are properly dried?
Properly dried herbs should feel crisp and crumble easily between your fingers. If they are still pliable or have any moisture, they need more drying time to avoid mold during storage.
Can I dry mixed herbs together, or should they be dried separately?
It’s best to dry herbs separately, as different herbs have varying moisture levels and drying times. Mixing them can lead to uneven drying and impact the flavor profiles of each herb.
How long do dried herbs last if stored correctly?
When stored in airtight containers in a cool, dark place, dried herbs typically last up to 1-3 years. However, for the best flavor and potency, it’s ideal to use them within the first year.
Is it safe to dry herbs in the sun?
While sun-drying is a method for some foods, it’s generally not recommended for herbs. Direct sunlight can degrade their flavor and color. Instead, opt for air drying in a shaded, well-ventilated area.
What should I avoid when drying herbs at home?
Avoid using herbs that are wet or dirty, as this can lead to mold growth. Also, steer clear of high temperatures that can burn flavor compounds—opt for low-temperature methods like air drying or dehydrating.
Can I use the microwave to dry herbs quickly?
Yes, you can use a microwave for quick drying. Place herbs between two paper towels and microwave in short intervals (30-60 seconds) until they are crispy. This method requires careful attention to avoid burning.
How can I enhance the flavor of my dried herbs for tea?
To enhance flavor, consider combining herbs that complement each other, such as chamomile with mint. Additionally, use freshly dried herbs within the first year for optimal flavor and aroma in your tea blends.
Are there any herbs I should avoid using for tea?
While many herbs can be used for tea, some may have contraindications or be unsafe in large amounts, such as comfrey or certain medicinal herbs. Always research or consult with a health professional before using unfamiliar herbs for tea.
What are some alternative uses for dried herbs besides tea?
Dried herbs can be used in cooking, sprinkled on salads, incorporated into marinades, or used in homemade potpourri. They can also enhance baked goods by adding unique flavors to bread, cookies, and pastries.
